

Beacon Basingstoke Roofing

Lead roofing and leadwork in Basingstoke

We fit and repair sheet lead on Basingstoke roofs: chimney flashings, side-wall abutments, valleys, bay tops and dormer cheeks. The free survey comes first, and the photographs of your own lead show the split or lifted edge before anyone quotes. One fixed written price follows, and it lists each flashing, valley or abutment by length.

A leadworker dressing new lead flashing around a brick chimney on a tiled roof

The lead work we carry out

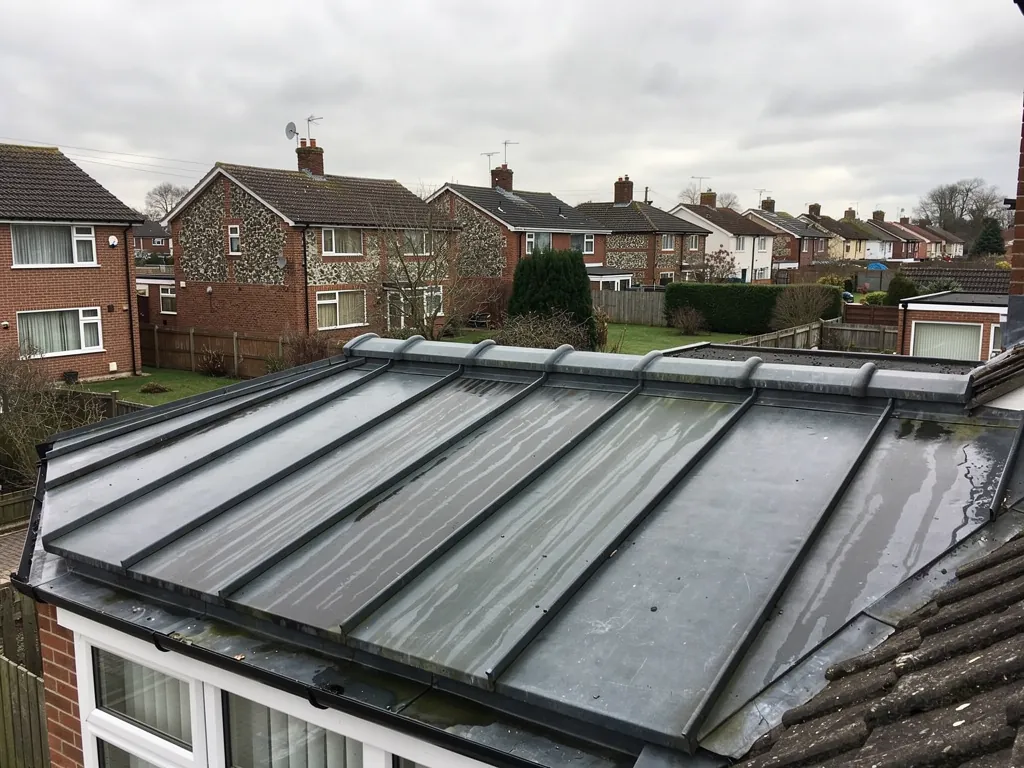
  • Close-up of a new lead-covered bay window roof with rolled seams

    Chimney flashings

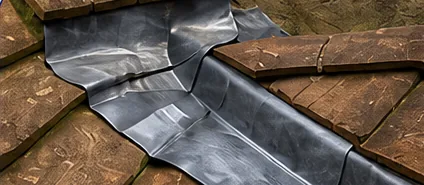
    Lead dressed round a chimney stack in several pieces: an apron at the front, stepped sections up the sides and a back gutter behind, each tucked into the brickwork and pointed.

  • Lead flashing where a chimney meets a tiled roof

    Valleys and abutments

    Lead gutters laid where two roof slopes meet, and flashings or soakers along walls that rise above a roof. These are the lines where rain is trying hardest to get in.

  • Roofer fitting roof tiles on a brick house near Basingstoke

    Bays, dormers and flat lead roofs

    Lead laid over a timber deck on bay windows, porches and dormers, jointed with rolls and drips so the sheets can move with the weather without splitting.

Signs your lead needs looking at

  • A brown stain on the chimney breast or ceiling beside it
  • Lead lifting away from the wall or hanging loose in the wind
  • A bead of grey sealant smeared along a lead edge
  • Fine splits running across a flat sheet of lead
  • Gaps or missing sections after a night of strong wind

Leadwork from first inspection to final dressing

  1. 1Survey of the leadworkWe get up to the lead, lift edges where we can, check the brickwork and boards beneath, and look inside.
  2. 2Lead photographs and priceYou receive pictures of the cracked, split or lifted sheet, the cause of each failure, and one written price.
  3. 3Strip, board and dressWe take off the old lead, repair the boards or masonry, then cut, form and fix new sheet to the right thickness.
  4. 4HandoverWe check each finished lap, chase and fillet with you and photograph them before the scaffold or tower comes down.

The lead work long read

Lead failures on Basingstoke roofs, from flashings to valleys, and how we renew them

Sheet lead has covered the awkward parts of British roofs for centuries because it can be bent, dressed into corners and left to weather for a very long time. It is a soft, heavy metal, and it behaves in particular ways: it expands in sun, it does not spring back fully, and it reacts badly to certain materials it touches. Most failures we are called to are down to one of those habits, or to the way a flashing was fixed in the first place. This guide follows the faults we meet around chimneys, side walls, valleys, bays and dormers, in town and in the surrounding villages. Every chapter describes the fault, then the fix. Chimney brickwork itself is covered under chimney repairs, while the lead around the stack stays on this page.

Chapter 1: Why does the chimney breast go damp after wind-driven rain?

What we find

Where a chimney stack passes through the roof, lead does the job of sealing a vertical brick shaft against a sloping tile surface. It is usually made up of separate pieces. A front apron sits over the tiles below the stack. Stepped flashings run up each side, following the brick courses. At the back, uphill of the stack, a back gutter collects water and sends it round to the sides. Each piece tucks into a raked-out mortar joint, called a chase, and is held there by lead wedges and pointing.

A damp patch on the chimney breast inside, or a brown mark on the ceiling beside it, usually points to one of those tucks. We find mortar that has dropped out of the chase so the lead hangs free, flashings that have been wedged with scraps of slate, and back gutters packed with moss and leaves that overflow into the stack. Rain driven sideways by a south-westerly then gets behind the lead rather than running over it. Another culprit is a flashing replaced with a roll of self-adhesive bitumen strip. It looks tidy for a season, then lifts in the heat and lets go of the brick.

What we fix

We start from the roof, not the ceiling. Tiles beside the stack are lifted so we can see how the old lead was laid, what sits behind it, and whether the timber around the stack has been wet for long. If the lead is sound and has only come loose, we can re-chase the joints, re-wedge and point, and that is a repair, which we will price as one. If it has split, thinned or been patched, we strip the lot and renew it.

New lead is cut to a pattern for each piece, with the stepped sections overlapping the soakers, the small rectangles of lead interleaved with the tiles that carry water away from the wall. The back gutter is formed with a proper fall to each side. The top edge of each piece goes into a freshly cut chase, secured with lead wedges, then pointed in a sand and cement mix that is kept off the lead face. Where the stack has a weak brick course or crumbling pots, the masonry fix belongs to our chimney repair work, and we agree the order with you so the lead is not fitted twice.

Scaffold or a tower is nearly always needed to do this safely, and it is shown as a separate line in the quote.

Before: Crumbling mortar under a clay ridge tileBefore
After: House roof stripped to battens during a roof replacementAfter
Typical of what we find and what we leave behind. Every survey includes photos of your own roof.

Chapter 2: Why does my ceiling leak where the roof runs up against a neighbour's wall?

What we find

A roof that meets a wall that carries on higher is called an abutment, and on a terrace or a semi it is one of the longest runs of lead on a house. Along a pitched abutment the lead is laid in steps, each step a separate section, so it follows the slope of the roof, with a soaker beneath each tile course. Along a flat abutment, such as an extension roof against the main house, the lead is a single apron fixed to the brickwork, lapping over the covering below.

On houses built in the 1960s and 1970s around Basingstoke we often find soakers left out and replaced with a continuous strip of metal or felt, which cannot flex with the tiles. The fixings are the next problem. Lead hung from nails or clipped with a few dabs of mortar may stay put for a year or two, then slumps as the weight and sun draw it downhill. A gap opens at the top edge, and rain runs behind it. Because the wall belongs to the next property, nobody checks it, and the first sign is a leak inside on a party wall. Pointing worn away by weather, or by an earlier repair done in cement, will let the lead drop clear of its chase.

What we fix

We work from both sides where we can: from the roof, to see the lead and the tiles it sits over, and from inside, to see how far the damp has travelled. A neighbour's wall can need an access agreement, which we raise with you at the survey so it is dealt with before the day.

The standard way to rebuild a stepped abutment is covered in our guide to soakers and step flashing: a soaker per course, a stepped flashing laid over the top, and every step tucked into a chase cut in the mortar joint. We cut the chase in the brick bed joint, not through the face of the brick, and fill it with lead wedges and a flexible, lime-friendly pointing mix where the wall is old. Along each length, the lead is kept short so the sheet can move without tearing itself against its fixings. Where the wall behind is rendered, the lead can finish in a cut-in reglet, a groove formed in the render, so the water leaves the face of the wall rather than running down it.

If only one or two steps have failed, replacing the damaged lengths can be a sensible repair. The photo report shows which situation yours is.

Chapter 3: Why do I get a drip from the line where two roof slopes meet?

What we find

A valley is the internal angle where two roof slopes run down to meet, and every drop of rain from both slopes funnels into it. In a lead valley, a long gutter of sheet lead sits on boards between the slopes, with tiles or slates trimmed to overhang it by a set distance on each side. The lead has a rolled or lapped edge under the tiles, and joints along its length, called laps, which must be long enough to keep water from being driven back up them.

The faults we see start small. A valley too narrow for the roof it drains is overwhelmed in a heavy shower and throws water over the edge into the roof space. Moss and leaf litter from nearby trees build up in the channel and hold water against the lead, which wears the surface faster. The lead itself can split along its centre line where it has been trodden on by a previous roofer, or crack at a lap where it was pulled tight. Boards beneath a long-neglected valley can rot, which leaves the lead sagging and ponding. A stain on the ceiling often turns up as a line following the valley across the room below. In some roofs an earlier repair has pushed a strip of mortar into the channel, and the valley now holds water instead of shedding it.

What we fix

We clear the channel first, because a valley full of debris hides the real fault. Then we lift the tiles along one edge so we can see the lead's laps and the boards beneath. A single split in an otherwise sound valley can be repaired with a welded or dressed patch, and the report records that. A valley with several defects, rotten boards or a channel that was never wide enough is rebuilt.

A rebuild starts with new boards laid to a continuous fall, then an underlay, then the lead. The thickness of sheet matters, and our note on lead codes explains how the number stamped on a sheet relates to the job. Tiles on each side go back with a clear overlap on the lead, and their cut edges are laid to keep a clean channel so the water runs straight down the middle. If you would rather not have lead in a valley, there are other materials, and we will talk through the trade-offs with you. We do not recommend one lead piece for a long valley, because heat will make it creep.

Chapter 4: Why has the lead on my bay roof opened up in lines across the sheet?

What we find

Lead is one of the more elastic metals on a roof, but it is not unlimited. In the sun a sheet grows. When it cools it should shrink back, but lead creeps a little each time and does not return all the way. On a sheet fixed tightly along every edge, there is nowhere for that movement to go, so the metal work-hardens and cracks. The splits tend to run across the sheet in straight lines, and they often appear in a roof only a few years old.

We see several causes. The sheet was laid too long: a run of lead that suits a small porch will tear if used on a long bay without a joint. The sheet was nailed along its edges, which pins it down. Or the lead went on bare timber with no layer beneath, so it stuck to the deck and could not slide. On older roofs the opposite occurs: lead has been laid on a deck that is soft or uneven, and foot traffic has dented the sheet along the board edges until it has thinned and split along the line of the joist. Condensation beneath a solid deck can also attack lead from underneath, leaving white corrosion on the underside, which is a different matter from surface weathering.

What we fix

The cure is to let the lead move. A lead roof is built in bays, with a roll or a step along every joint between sheets, and clips on the sheet edge to hold it down while still letting it slide. The rolls are timber battens, wrapped in lead and set along the fall. Where the roof is flat, steps called drips create a change of level in the deck so water cannot be driven uphill at a joint. Sheets are cut to lengths that suit their thickness, and a separating layer goes between the lead and the deck so it can slide and so resin or acid from the timber cannot reach it.

Small cracks can be repaired by lead welding, which fuses new metal into the split, or by a dressed patch, depending on the position. Both only last if the underlying cause is dealt with, so we check the deck, the sheet length and the fixings. If the roof has been rolled and clipped properly and has simply fatigued, renewing the covering is more reliable than chasing cracks across the surface. Corroded undersides call for a look at ventilation too.

Chapter 5: Should my bay window roof or dormer be done in lead, and what goes under it?

What we find

The roof over a ground-floor bay is a small, complicated piece of roofing. It usually has a flat or shallow top covered in lead, with each corner a chance for water to find a way in, and a wall above it that the lead has to rise against. Dormers add vertical cheeks on each side, the little walls beside the window, and a flat top that is often lead as well.

On Victorian and Edwardian terraces in the older parts of Basingstoke and the towns around, we meet bays whose lead has been covered with felt, then bitumen paint, then felt again, each layer a response to the last leak. Underneath, the original lead may be thin, creased at the corners and nailed through. At the window head the lead has often been tucked into the frame with no drip, so water tracks into the brickwork above the glass. Dormer cheeks are often the worst. Lead dressed over tile-hung or clad cheeks rarely has soakers or a proper return, so rain runs behind it into the framing, where the timber rots out of sight.

What we fix

For a bay or a dormer, lead is often the right choice because it can be dressed into the corners and left to weather. We strip any layers of felt and paint, check the deck and the timber at the window head, and replace what is soft. We then lay a separating layer, form the rolls and drips, and dress the lead up the wall under a cover flashing. Our guide to lead bay roofs, canopies and dormers shows how the pieces are put together.

For dormer cheeks, we lay the lead in soaker-sized pieces over the face, with each piece lapping the one below, so water on the cheek is carried out over the tiles and never back towards the frame. The front edge of the dormer roof gets a drip and a proper return over the fascia.

The alternative for a flat bay top is a rubber or GRP covering, and our page on flat roofing covers those. We say which we would choose for your bay and why, and lead is not always the winner. In a conservation area or on a listed building, like-for-like lead is usually expected, so please check with the council's conservation officer before any change of material.

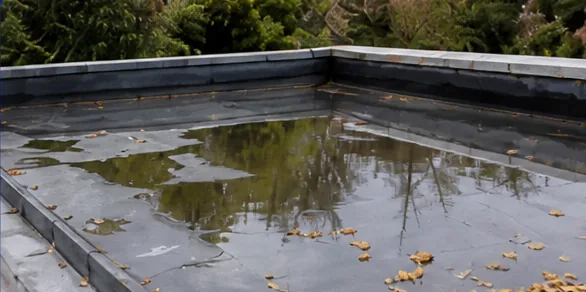
Before: Water ponding on a domestic flat roofBefore
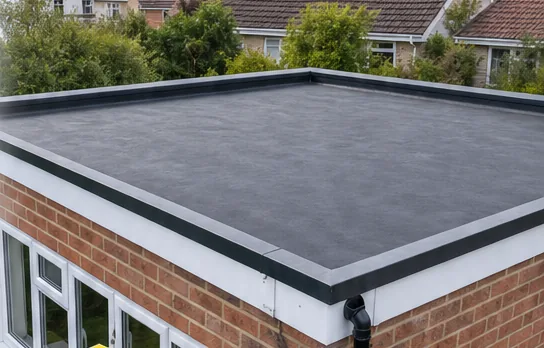
After: New EPDM flat roof on a brick extensionAfter
Typical of what we find and what we leave behind. Every survey includes photos of your own roof.

Chapter 6: A previous roofer ran silicone and a cement fillet along my flashing. Is that a problem?

What we find

It is one of the most common finds on an older roof: a line of grey mastic along the top of a flashing, or a bevelled ridge of sand and cement running along the junction between a wall and the tiles, called a fillet. Both were meant to be quick, cheap repairs. Both get used instead of lead.

Sealant fails because of movement. A roof is warmed and cooled every day, the brickwork and the lead expand by different amounts, and a sealant bead has to stretch to cope. Over a few seasons it hardens, shrinks and peels away from the brick, leaving a hairline gap that looks tight from the ground. A mortar fillet fails the same way, only it cracks as well as letting go, and when it cracks the pieces fall into the gutter. Cement has another effect. Fresh mortar is strongly alkaline and will eat into lead that touches it, so a flashing bedded straight into cement can corrode at the edge in a few years. Water finds the gaps and runs behind, so the fillet becomes the cause of damp in the wall rather than the cure.

What we fix

A sealant bead on a lead flashing is not a repair we will sell you, and we say so at the survey. Our short guide to repairing lead flashing with sealant goes through where it can be a stop-gap and where it makes things worse.

The proper fix is to remove the failed material and put lead where lead belongs. We cut out the fillet and any residue, take the damaged flashing away, and clean the wall and the tile edge. If the wall surface is sound, we cut a chase into the joint, fit new lead with soakers beneath it, and wedge and point it. The mortar for the pointing is chosen to suit the brickwork, a lime mix on old walls and a cement-based one on newer brick, and it is kept off the lead surface as it cures.

The damp that has been getting behind the old fillet needs a look as well. We check the plaster inside, the timber at the wall plate and any rot in the tile battens. If those are sound, the cost of putting right a failed fillet is typically a little more than a patch and far less than the damage a hidden leak can do over several winters. The photo report shows what we found behind the old material.

Chapter 7: Part of my roof lead has been stripped or blown away. What happens next?

What we find

Lead is heavy and has a scrap value, which is why it is stolen from roofs, churches and outbuildings. Most house roofs are not targeted often, but a flat roof over a garage, a rear extension reached from a lane, or a porch over a side passage is easy to get at. Strong wind does a different kind of damage. A flashing held on by a few nails and a smear of mortar can peel back in a storm and be left curling over the tiles.

The immediate danger is water. A stack with a gap in its flashing, or a bay with a missing sheet, lets rain straight onto the timbers and the ceiling below. In our experience the sheets left behind are rarely the problem. The difficulty is the deck. Lead taken in a hurry is often pulled up with its clips and nails, which tears the boards, and the roof then lies open for days. Damp timber and plaster follow quickly. If the theft or storm happened in the last few days, your first call is the police for a theft, and your own insurer, who will tell you what they need from a roofer. We do not give advice on your policy, and we do not state cover amounts.

What we fix

We prioritise leaking roofs. The first visit is about making the roof safe: a temporary covering over the exposed area, secured so it will not blow off, and any loose sheet taken down before it hurts someone. A permanent repair needs the weather to settle, and a dry surface to work on.

The photo report is useful here. You get dated pictures of what is missing and the damage to the deck, which many insurers will ask for. We write the repair as a fixed, itemised quote so you can send it on. Then we replace damaged boards, lay a new separating layer, and form the new lead in the same pattern as the old, so rolls, drips and flashings come back in the right places. Where lead has been stolen from a roof that is easy to reach, we talk about options such as alternative coverings, or fixings and details that make the roof less attractive to thieves. Lead is the traditional answer in many places and a lead-free flashing system, a cheaper material made to look like lead, is another. We lay out the trade-offs without pushing you either way.

Old lead is recycled, and we take it away with the rest of the waste.

Chapter 8: What decides the price of replacing lead around a chimney?

What we find

People are often surprised by how widely quotes for chimney lead differ, and it is rarely because one roofer is padding the price. The same-looking job can be a small repair or a full rebuild. A chimney with a simple rectangular stack, a clear roof and a flashing that has simply come loose is a modest task. A tall stack with a party-wall flue, steep tiles, a bay of rotten boards and a missing back gutter is not.

Access is the single biggest cost driver. Roofs that can be reached from a ladder cost less than ones that need a scaffold tower or a full scaffold, which may be shown as a separate line. The number of sides matters: flashing all four sides of a stack is more work than one. The condition of the brickwork changes the labour too, since a chase cut into soft old mortar crumbles and needs extra work. Finally, the thickness and pattern of lead and how much needs replacing at the soakers and gutter all influence the sum.

What we fix

Typical UK ranges for chimney leadwork are published by cost guides, and they show how wide the spread is. These are not Beacon prices, and your fixed quote follows the survey. The table below sets out the reported figures, and a few things sit behind them.

First, scaffold. If the stack is high or the roof steep, the scaffold can be a large share of the total, and it can be shared with other work you have in mind, such as repointing the stack or fitting new pots. Second, the repair-or-replace decision. A patch repair on a flashing that is mostly sound costs less than renewing it, and where patching will carry the flashing for years, patching is what we price. Third, the cost of putting it off. Lead that has failed lets water into the roof structure, and the repair that follows is usually dearer than the lead.

Our guide to lead flashing replacement cost sets out the factors in more detail.

Lead gives itself away at the edges, so the most useful thing to do before we visit is photograph the flashing from the ground and note where the stain shows inside. We use those to know where to look first: the chase, the lap or the valley. On the roof we lift edges where we can, then send pictures with a single written price. We guarantee our lead workmanship for 10 years. Book on 01256 213956, or WhatsApp the pictures.

Lead work: questions we get asked

How long should new lead on a roof stay watertight?

Lead is a long-lived metal when it is laid properly, and well-fitted lead can outlast the tiles around it. How long yours lasts depends on the thickness of the sheet, how it is fixed, and whether it is allowed to move. We do not promise a lifespan, but we explain how we have laid it so you can see what protects it, such as clips, rolls and short sheet lengths.

Is it safe for you to handle old lead sheet, and what happens to it?

Lead is a hazardous material if it is cut dry, burned or breathed in as dust, so we handle old sheet carefully, wash hands before eating and keep offcuts off the garden. It is not a danger from simply sitting on a roof. Strips taken from your roof leave with the other waste, and the site is cleared at the end. Old lead is a recyclable metal, so it does not go to landfill. If you have children or pets, we keep them clear of the work area.

Can you replace the lead around my chimney without touching the chimney itself?

Usually, yes. The flashings sit in chases cut into the mortar joints, so they can be taken out and renewed without rebuilding the stack. If the brickwork round the chases is crumbling, the new lead will not hold, so we repoint those joints first or tell you the stack needs masonry repair. We look at that at the survey, and the photo report shows the condition of the brick next to the lead, so you know the order of work before you agree.

Do I need permission to replace lead on a listed or conservation area home?

Like-for-like repairs are usually fine, but a change of material, colour or appearance may need consent. If your home is listed or in a conservation area, check with the council's conservation officer before choosing anything other than lead. We can describe the work and send the survey photographs to support your enquiry. Historic England publishes guidance for owners of older buildings, and we are happy to follow what the conservation officer asks for.

What is the white powder on lead that has been on the roof a few months?

It is a natural surface layer. New lead reacts with air and moisture and forms a pale carbonate coating, which is part of how the metal protects itself. It can streak where rain runs off the lead onto masonry. We treat new lead on request to reduce the streaking while the surface settles, and a plain grey finish develops over time. White crust on the underside of a sheet is different, and we check that against the deck and ventilation.

My leak appeared after the lead was replaced last year. Can you take a look?

Yes. Send us photographs on WhatsApp or book a survey and we will find out whether the new lead has failed or whether the water is entering somewhere else, such as a cracked tile, a blocked gutter or the stack itself. We will not rule out another cause just to sell you a repair. If a different roofer laid the lead, we tell you what we find and what we would do, and the written quote follows the survey.

Get your free roof survey

Tell us what’s happening and we’ll call you back to arrange a visit. You’ll get photos of your roof and a fixed written quote.

  • No obligation
  • Photo report of your roof
  • 10-year workmanship guarantee

Rather talk? 01256 213956

Call Free survey