People often ask what they are actually paying for, or receiving free, when a roofer says they will inspect a roof. The honest answer is a sequence. A good inspection is not a glance from the pavement and a verdict; it moves through the roof part by part, because each part fails in its own way and each is checked in its own way. The order below is the one we follow, and you can use it as a checklist to compare any inspection you are offered. If a visit skips half of these stops, you have received a quick look, not an inspection, and the report will be only as thorough as the visit.
Before the ladder goes up
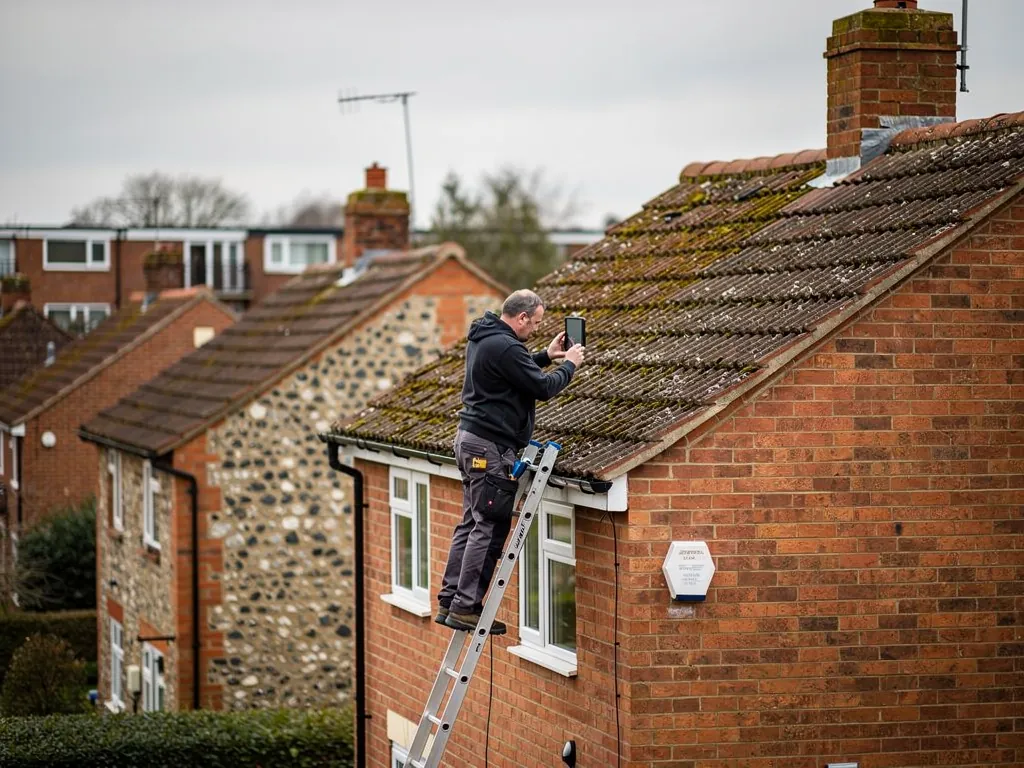
The first part of an inspection happens at the kerb. We note the type of building, the roof's shape and pitch, the age of the property where known and the covering: plain clay tiles, concrete interlocking tiles, natural slate, flat membrane or something else. We ask what has been seen or suffered, such as stains, drips, noises in wind or earlier repairs. And we walk round the outside to read the roof from the ground, since a lot shows from there. The lines of ridges and eaves, the pattern of the tiles, moss, missing pieces, visible patches and the state of the chimney all give a first impression of how the roof has aged.
Then comes the access plan. Ladders, towers or a scaffold, edge protection and roof ladders where we need to walk on a slope are chosen to suit the roof and its height. Work at height has rules, and a sensible inspector never risks a fall for the sake of a quicker look. If a roof cannot be reached safely, we say so, and we may use a drone or a camera on a pole for the parts we cannot walk.
The main covering
On the slopes themselves we check each tile or slate in turn, including the ones that look fine from the ground. We look for cracks, chips, delamination (layers flaking from the surface of old tiles), slipped or missing pieces and tiles that have lifted at a corner. Interlocking concrete tiles are checked at their clips and headlocks, and plain tiles at the nibs and nails that hold them. Slates are checked for slippage, snapped fixings, corroded nails and the telltale streaks of rusty water. Where possible a few tiles are lifted to inspect the battens, the horizontal timbers the tiles hang from, and the underlay beneath. This matters, because a covering can look fine while the felt beneath is split.
We also look at surface condition. Moss and lichen are noted, as is general erosion of the face of the tile. Heavy growth holds moisture and can lift edges, while light growth is mostly cosmetic. A covering that is flaking, porous or covered in broken pieces may have little life left, and we say so. Pitch and fall are checked, because a roof that has sagged or bowed will hold water in the wrong places.
Ridges, hips and verges
The edges and tops of a pitched roof take the most abuse. Ridge and hip tiles are tested by hand for movement and checked for cracked or missing bedding mortar. Current standards expect these components to be mechanically fixed, so we also note whether the roof has fixings, a dry-fix system or only mortar. Verges, the edges along a gable end, are checked for tiles that have lost their mortar bedding or their fixings, because wind lifts them first. At the eaves, where the roof overhangs the wall, we look at the first course of tiles, the eaves felt and the way water enters the gutter.
Valleys, flashings and abutments
Where two slopes meet at a valley, or where a roof meets a wall, water concentrates, and that is where leaks begin. Valleys can be lined with lead, GRP or tiles laid in a "swept" pattern, and we check each for splits, debris and gaps. Flashings, the strips of lead or other metal that seal the joint between roof and wall, are checked where they are fixed, where they are lapped and where they are sealed. We look for lead that has lifted, split or slipped, mortar fillets that have crumbled, and sealant that has been used as a substitute for a proper detail. Soakers, small pieces of metal that lie under the tile edge at an abutment, and step flashings along a sloping wall are checked too.
Chimneys
A chimney is a roof in miniature, with its own parts. We check the stack for cracked or crumbling brickwork and open joints, the flaunching, which is the mortar slope around the base of the pots, for cracks, and the pots and cowls for looseness. The flashing and any back gutter where the stack meets the roof are checked closely. A chimney that is no longer used should still be capped and ventilated, and we note anything that is missing. Our companion page on the chimney repairs service covers the repair side.
Flat roofs and roof windows
If the building has a flat roof, whether a rear extension, a dormer top or a porch, it is checked separately. We look for ponding (puddles that remain after rain), blistering, splits, lifted laps and failed upstands. Outlets and gutters are cleared of debris and checked for fall. Edge trims and drips are checked for tightness. Roof windows and rooflights are examined for cracked glass, failed seals and flashing kits that have shifted or lost their sealant. Items that were added later, such as solar panels, aerials, vents and satellite dishes, are checked for how they were fixed and whether any penetrations are properly sealed.
The roofline and rainwater goods
The roofline is the strip of timber or plastic that finishes the edge of the roof. Fascias run along the eaves and carry the gutters, soffits close the underside of the overhang, and bargeboards cover the sloping edge of a gable. Timber versions are probed for rot, especially at joints and below leaking gutters, and plastic versions are checked for warping, cracking and gaps. Gutters and downpipes are checked for fall, leaks at joints, blocked outlets, loose brackets and staining on the wall below that shows overflow. Gutters are often the true cause of damp that looks like a roof fault, so they are always included.
The loft
An inspection done only from the outside misses half the picture, so we go into the loft whenever access allows. We check the underside of the roof for daylight, stains, wet timber and damaged felt, the insulation and its depth, the ventilation at the eaves, the roof structure for rot and movement, and the chimney breast, pipes and any water tanks. Our guide to inspecting your loft describes what each sign means, and our answer on whether a roof inspection includes the loft explains how the two views are combined in one visit.
| Area | What is checked | What a fault leads to |
|---|---|---|
| Covering | Cracks, slips, surface wear, battens and felt where visible | Leaks, lost tiles, shorter roof life |
| Ridge, hip, verge | Bedding, fixings, movement | Loose tiles in wind, water under the ridge |
| Valleys and flashings | Lead, splits, debris, mortar fillets | Concentrated leaks at junctions |
| Chimney | Brickwork, flaunching, pots, flashing | Damp on the breast, falling masonry |
| Flat roof | Ponding, laps, upstands, outlets | Persistent leaks, rot in the deck |
| Roofline and gutters | Rot, warping, fall, joints, brackets | Overflow, wall damp, rotting timbers |
| Loft | Light, stains, felt, ventilation, timbers | Condensation, hidden rot, wet insulation |
Checks that are not about the roof covering
Some findings have little to do with tiles and everything to do with what lives or hides in the roof. Nesting birds, wasps and bats all use roof spaces, and bats and nesting birds are protected, so if we see signs of them, work may have to be timed or surveyed first. We also note old materials that could contain asbestos, such as cement sheets on a garage or textured board in a loft, and we do not disturb them; the next step is to have them identified properly. Aerials, satellite dishes and solar panels get a quick check too, since the fixings that hold them can break the weatherproof layer beneath.
Access for future work is part of the picture as well. If a roof has no safe way to reach a chimney or a valley, or if a gutter cannot be cleaned without a tower, we record that, because it affects the cost and frequency of maintenance. Where a roof has fall-arrest anchors, edge protection or walkways, and those are in poor order, that goes in the report too.
Weather, light and timing
The best conditions for an inspection are dry, calm and bright, with no ice or wet moss on the surface. Strong wind makes ladder work unsafe, and rain makes slopes treacherous and hides small defects under a film of water. That said, a visit during or soon after heavy rain can reveal a leak better than any amount of sunshine, so the loft is sometimes inspected in wet weather and the roof itself on a drier day. If we have to postpone, we say why. A visit that goes ahead in poor conditions produces a poor report, and nobody benefits from that.
How the checklist changes with the roof
The same list of stops applies to every roof, but the emphasis shifts. On a thatch or a stone-slate roof the covering is the long study and the detail at the ridge matters most. On a Victorian terrace with a party wall the lead flashings and chimneys take up most of the time. On a 1960s semi with concrete tiles the focus is on the ridge bedding, verges and the condition of the old felt. On a commercial unit with a profiled metal or single-ply roof, the checks add laps, fasteners, rooflights, walkways and the outlets that drain a large area. We adapt the checklist to the building, but we do not drop a stop just because it is awkward.
What you should receive at the end
The inspection is only as useful as what comes out of it. You should get a written report with photographs of each finding, tied to its location, a plain statement of urgency and a view on whether the roof needs repair, partial re-covering or replacement. You should also get honest comments on what could not be checked and why. Our page on roof condition reports goes through how to read one, and the short answer on how long a roof inspection takes sets expectations for the visit itself.
Our own survey costs nothing, comes with photographs and, when work turns out to be necessary, ends in a price written down and fixed. A roof with plenty of service left gets told exactly that. To arrange one, start at the roof inspections in Basingstoke page, or phone 01256 213956.
